Mar 25, 2021 | 2020-2021 Annual Catalog, Arrange A Wreath, Bundles, Cards, Holiday, Uncategorized |
Early last Fall, I had the opportunity to present projects featuring the Arrange A Wreath bundle to the Luv 2 Stamp Group. Today, I am sharing the Arrange A Wreath Easter card from the event. In addition, full instructions for recreating the card just in time for use this upcoming Easter. The Arrange A Wreath bundle is very versatile and great for different occasions. Following information on today’s card, you’ll find links to the past posts featuring the bundle.

Card Instructions:
Materials:
Cardstock (CS):
- Bermuda Bay: 8-1/2″ x 5-1/2″, score at 4-1/4″ – for card base
- Granny Apple Green: 5-1/4″ x 4″ (layer 1); scrap for leaves
- Basic White: 3-3/4″ x 5″ for emboss layer; 1″ x 2″ for sentiment; scrap for flower centersVellum Cardstock: 3-3/4″ x 3-3/4″
- Daffodil Delight Cardstock: scrap for 2 flowers
- Rainbow Glimmer Cardstock: scrap for 3 eggs
Ink Pads:
- Versamark, Bermuda Bay Classic Stamp Pad, Granny Apple Green Classic Stamp Pad
Other Materials:
- White Stampin’ Emboss Powder
- Layering Ovals Dies
- Pool Party 3/8″ Sheer Ribbon
- Basic Rhinestone Jewels
- Dark Daffodil Delight Stampin’ Blends Marker (opt)
- Heat Tool
- Sponge Dauber or Blending Brush
- Adhesives
Details:
- Add the Granny Apple Green CS layer to the Bermuda Bay card base. Stamp the wreath onto the Basic White CS with Versamark. (TIP: use the Stamparatus and if needed, stamp twice to
ensure all of wreath is stamped). Heat emboss the wreath with White Stampin’ Emboss Powder. Allow to cool. After cooling, sponge the Basic White paper with Bermuda Bay ink, layering the ink around the wreath. Add to the card. - Stamp three sets of leaves (Granny Apple Green on Granny Apple Green CS) and a set of eggs (Bermuda Bay onto Basic White cardstock). Cut with the coordinating Dies.
- Cut an additional three eggs from the Rainbow Glimmer CS.
- With the medium size flower die, cut two of flowers from Daffodil Delight CS and cut two of the small flowers from Basic White CS. Layer the white flower onto the yellow flower. Add a small rhinestone jewel to the center of the flowers. (opt -color the rhinestones with the Daffodil Delight Stampin’ Blends Marker before adding to the flowers).
- Cut the Vellum CS using the “twig” wreath die.
- Add eggs along the bottom of the wreath with glue dots. Layer leaves and flowers around the eggs. Cut “twig” strips from the vellum wreath and tuck around the flowers and eggs.
- Stamp the sentiment onto Basic White CS and cut using the Layering Ovals Dies.
- Cut a scalloped oval from the Bermuda Bay CS and add the sentiment layer. Attach to card using Stampin’ Dimensionals.
- Complete the card by adding a double loop bow to the top of the wreath.
You can easily substitute the sentiment and use this springtime card for any occasion.
Here are links to additional posts using the Arrange A Bundle: Home Decor Project, Merry Christmas, and Mini Card Pack. As you’ll be able to see, there are many options for using this bundle. Take note – this bundle is on the Last-Chance Products Sale list released yesterday (see Reminder section below). Thus, it will be retiring with this catalog so order it soon to ensure you have this versatile set for your crafting.
JUST A REMINDER…

The current catalog will be retiring on May 3, 2021 so it’s the time to take advantage of discounts on some of your favorite items. Plus, you’ll want to nab items that will retire before they are no longer available. Note, some items are discounted up to 75% and available only while supplies last. Check out the Last-Chance Products Sale items here. Several bundles are retiring but will be available individually without the additional bundle savings in the catalog. To view a PDF list of the Last-Chance Product Sale items, you can download it here: Last-Chance Products 2020-2021 Annual Catalog. So grab your highlighter marker, highlight items wanted and place your order soon!
Here are a few of my favorites retiring: Stitched Shape Dies, Layering Ovals Dies, Circle Punches (all sizes!) and the Silver Foil Paper. I’m still in mourning over the loss of the Stitched Shape Dies!!!

The April 2021 Paper Pumpkin kit subscription period is now available. This vivid, summer-inspired kit includes two full sticker sheets and all supplies needed to make 12 fun-shaped cards with matching envelopes. But, even more cool: it’s the first Paper Pumpkin kit designed with kids in mind!
Details
- Kit includes enough supplies to make 12 fresh, fun-shaped cards—6 popsicles and 6 blank semicircles to color—and coordinating envelopes. Kit includes card bases, 2 full sticker sheets, decorative die-cut pieces, embellishments, and more.
- Envelope size: 4-1/2″ x 5-3/4″
- Coordinating colors: Blackberry Bliss, Bermuda Bay, Bumblebee, Cinnamon Cider, Old Olive, Terracotta Tile
- Coordinates with the Ice Cream Corner Suite from our January–June 2021 Mini Catalog.
The So Cool Paper Pumpkin kit is available through April 10, 2021 but note supplies may become limited near the end of the subscription period.
To subscribe, click here.
Margaret’s Customer Loyalty Program: Download the form (2020-2021 Customer Loyalty Form) for program details and start tracking your orders. Plus for orders over $150, you’ll also receive rewards from Stampin’ Up! Thank you for placing your order with me. You can order by clicking this link: Margaret’s Online Store. I sincerely appreciate your orders.
Thanks for stopping by and happy crafting!

Project Materials:
The current host code is: XKHBAKBQ. Please use this code if your order is $150 or less (before shipping & taxes). Remember, if your order is over $150, you will receive the host rewards.
Mar 3, 2021 | Art Gallery, Birthday, Birthday, Cards, Designer Series Paper, Fine Art Floral, January-June 2021 Mini Catalog, Stampin' Up!, Uncategorized |
Since March is full of birthdays for many family members, it has kept me busy creating birthday cards. One of my sister’s is the lucky recipient of the Fine Art Floral birthday card. If you’ve not seen the products in the Fine Arts Floral Collection, you must check it out. The Fine Arts Floral Designer Series Paper is gorgeous! There are a variety of patterns to select from but I especially was drawn to the pattern on the card below. It’s beautiful on it’s own but I knew on a Navy cardstock base highlighted with the Gilded Leafing, it would be even more gorgeous. This was my first use of the Gilded Leafing and I love how it creates an elegant card, especially when combined with the Fine Art Floral Designer Series Paper.

Fine Art Floral Birthday Card:
- Card base: Night of Navy cardstock 5-1/2″ x 8-1/2″, scored and folded at 4-1/4″.
- Very Vanilla cardstock: 5-1/4″ x 4″ plus a scrap piece for the sentiment pieces.
- Fine Art Floral Designer Series Paper: 3 strips at 1-1/4″ x 3-1/2″
Assembly Details:
- For the first step, apply Gilded Leafing along the edge of the Very Vanilla (5-1/4″ x 4″). To ensure there is enough gilding, make sure it creates at least a 1/4″ border around all side edges of the card. TIP: Use Tear & Tape since it’s the width needed.
- After gilding along the outer edges of the Very Vanilla cardstock, add the Fine Art Floral Designer Series Paper panels spacing evenly.
- Next, add the Gilded Leafing to cover the Very Vanilla cardstock between the panels. Again, use Tear & Tape and then apply the gilded leafing. To attach layer to the Night of Navy card base, use Stampin’ Seal+.
- For the sentiment, stamp using Night of Navy Classic Stampin’ Pad onto a piece of Very Vanilla cardstock. Use Layering Circles Die to cut circle to fit within the Gold Hoop Embellishment. Attach to the gold hoop and add to the card front using Stampin’ Seal+. Embellish around the sentiment with Gold Glitter Enamel Dots.
- For the flower embellishment, use the small flower stamps from the Art Gallery Photopolymer Stamp Set. Stamp the flower body using Petal Pink and the inner petals with Merry Merlot. Cut using the coordinating Floral Gallery Dies. Stamp the leaves using Old Olive Classic Stampin’ Pad onto a scrap of Old Olive cardstock. Trim as needed to fit behind flower when attaching to the sentiment piece. Attach flower and leaves using Stampin’ Dimensionals.
- With Dark Night of Navy Stampin’ Blends, color a piece of Gold Metallic Edge Ribbon. Then, tie into a bow (if desired, add strips of Very Vanilla Scalloped Lace Trim and Petal Pink Ribbon when forming tail of bow). Add the bow to the base of the flower on the card using glue dots.
Be sure to check out the products in the Fine Art Floral Suite Collection and order your favorite items. But definitely, add the Fine Art Floral Designer Series Paper and the Gilded Leafing to a “must have” order list.
JUST A FEW REMINDERS…
MARCH PAPER PUMPKIN

Details
- Kit contains enough supplies to create 8 cards—4 each of 2 designs—and coordinating envelopes. The kit’s contents include printed card bases, die-cut paper pieces, embellishments, adhesive, and more!
- Card size: 4-1/4″ x 5-1/2″ (10.8 x 14 cm)
- Envelope size: 4-1/2″ x 5-3/4″ (11.4 x 14.6 cm)
- Coordinating colors: Bumblebee, Calypso Coral, Old Olive, Petal Pink, Pretty Peacock, Seaside Spray
- Includes four free stencils and a stamping sponge!
- Arrives in a cute and collectible box.
Subscribe here to receive the March kit. Remember, the last day to order is March 10 so don’t delay, supplies may be limited near the end of the promotion.
Margaret’s Customer Loyalty Program: Download the form (2020-2021 Customer Loyalty Form) for program details and start tracking your orders. Plus for orders over $150, you’ll also receive rewards from Stampin’ Up! Thank you for placing your order with me. You can order by clicking this link: Margaret’s Online Store. I sincerely appreciate your orders.
Thanks for stopping by and happy crafting!

Project Materials:
The host code for March is: AS74UVX2. Please use this code if your order is $150 or less (before shipping & taxes). Remember, if your order is over $150, you will receive the host rewards.
Feb 3, 2021 | Cards, January-June 2021 Mini Catalog, Quick & Easy, Simple Stamping, Snailed It, Whimsical |
Looking for a fun, whimsical bundle?! Look no more – the Snailed It Suite provides lots of playful, whimsical fun. Today’s Happy Mail card uses the Snailed It Bundle. The bundle includes the Snailed It Stamp Set and coordinating Snail Dies. And using with the Snail Mail Designer Series Paper makes it easy to create a bright, cheerful card. Best of all, the Snail Dies coordinate with some of the images in the designer series paper. See the snail on the Happy Mail card? It’s cut from the Snail Mail Designer Series Paper with a coordinating die. Easy -peasy! Stamp the envelope with Happy Mail enclosed and the card is set to mail. This card definitely is #simple stamping!

Details:
Create the card base using Daffodil Delight cardstock (8-1/2″ x 11″, score and fold at 4-1/4″). Attach a 4″ x 5-1/4″ layer of the Bermuda Bay designer series paper from the Snail Mail DSP pack onto the card base. Cut a 1″ x 4″ strip of the mini hearts designer series paper and attach to the card – referring to photo for placement. Using the Snail Dies, cut the following: a large snail from the designer series paper; one large and two small mushrooms from a scrap of Real Red cardstock, the inside note from a scrap of Basic White cardstock and the envelope from a 3″ x 3″ square of Daffodil Delight cardstock.
Stamp “hello” onto the Basic White note using Bermuda Bay Classic Ink Pad and embellish with the Resin Hearts. Fold the envelope flaps leaving the top flap open. Glue Dots hold the flaps closed. Slide the note into the envelope, attach with glue dots to secure and use Stampin’ Seal+ to add to the card front. Finish the card by adding mushrooms to the card front and layering the large snail using Stampin’ Dimensionals. And don’t forget – stamp Happy Mail enclosed onto the envelope using Real Red Classic Ink Pad.
Youngsters and young at heart will enjoy receiving Happy Mail!
Reminders:
It’s time to Sale-A-Brate!!! What is that you ask? Sale-A-Bration is one of our biggest promotions of the year. During Sale-A-Bration you can earn FREE products with qualifying purchases. The FREE products are in the Sale-A-Bration Brochure. Click here to Shop With Me and view the online Sale-A-Bration brochure under the Sales and Specials tab.
As an added bonus – if you JOIN and become a demonstrator during Sale-A-Bration, you will receive a free stack of our Regals, Subtles, Neutrals, Brights, and 2020—2022 In Color Designer Series Paper along with your Starter Kit! There couldn’t be a better time to join the Stampin’ Up! family and becoming a member of my Playtime with Paper group.
Sale-A-Bration is ongoing until February 28, 2021.
Margaret’s Customer Loyalty Program: Download the form (2020-2021 Customer Loyalty Form) for program details and start tracking your orders. And for orders over $150, you’ll also receive rewards from Stampin’ Up! Thank you for placing your order with me. You can order by clicking this link: Margaret’s Online Store. I sincerely appreciate your orders.
Thanks for stopping by and happy crafting!

Project Materials:
The host code for February is: WJG4ZYAK. Please use this code if your order is $150 or less (before shipping & taxes). Remember, if your order is over $150, you will receive the host rewards.
Nov 20, 2020 | August-December 2020 Mini Catalog, Cards, Christmas, Fun Folds, Holiday, Snowflake Wishes, Winter Snow Embossing Folder |
It’s always fun to find alternate folds to use for card designs. Today’s design is a side fold shared by Patty Bennett during a team stamping event. So, I added the fold to my “must create” fun fold list. Using the So Many Snowflake Dies, multiple snowflakes are cut and layered to embellish the Snowflake Side Fold Card. The Winter Snow Embossing Folder creates the perfect background for the layered snowflakes.

Materials:
- Snowflake Wishes Bundle
- Balmy Blue cardstock: card base: 4-1/4” x 11”, score at 5-1/2” & 6-3/4”; scraps for cutting snowflakes
- Snowflake Splendor Designer Series Paper: 1” x 4”
- Whisper White cardstock: 4” x 4” (2 pieces – for front & interior)’ 1” x 3-1/2” for sentiment
- Balmy Blue Glimmer Paper – for large, medium & small snowflake
- Winter Snow Embossing Folder
- Misty Moonlight Classic Ink Pad
- Blue Adhesive-Backed Gems
- Snowflake Splendor ¼” ribbon
- Stampin’ Seal+ Adhesive
- Glue Dots
- Stampin’ Dimensionals
- Stampin’ Cut & Emboss Machine
- Optional: Tag Punch to cut notch for ribbon
Directions for Assembly:
- Fold Balmy Blue card base along fold lines. Use adhesive to seal the card front to the card back in the area between the score lines (5-1/2” to 6-3/4”).
- Add the strip of designer series paper to the card front (sealed section).
- Texture emboss one of the 4” x 4” Whisper White cardstock pieces. Attach to the card front.
- Snowflakes: use the snowflake dies to cut a large, medium and small snowflake from the Balmy Blue Glimmer Paper and the Balmy Blue cardstock. After die cutting snowflakes, layer the cardstock pieces atop the glimmer paper pieces attaching with glue dots.
- Stamp sentiment onto strip of Whisper White cardstock using the Misty Moonlight Classic Ink Pad.
- Position snowflakes to the card front and attach using glue dots.
- Add sentiment strip using Mini Stampin’ Dimensionals.
- Embellish the center of each snowflake with a Blue Adhesive-Backed Gem.
- Finish the card by wrapping a ribbon around the left side of card, overlapping ends on front of the card. Tie a small bow using the ribbon and attaching where the ribbon overlaps on the card front. TIP: to hold ribbon in place, use tag punch (or another punch) to cut a small notch wide enough to create a track for the ribbon
Be sure to give the side fold card design a try! And add the Snowflake Wishes Bundle to your order, it’s a great set for winter themed cards.
Reminders:
Margaret’s Customer Loyalty Program: Download the form (2020-2021 Customer Loyalty Form) for program details and start tracking your orders. Plus for your orders over $150, you’ll also receive rewards from Stampin’ Up! Thank you for placing your order with me. You can order Project Materials at the bottom of the post or click here to visit my Online Store. I sincerely appreciate your orders.

Curvy Celebrations is underway! The Quite Curvy Variety Bundle is now available for you to order. Click here to view the products available.
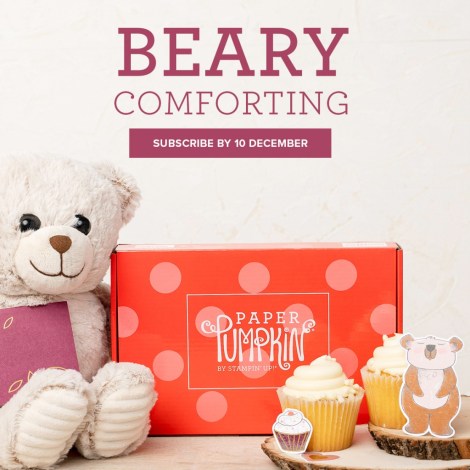
Beary Comforting Paper Pumpkin Kit – Available for ordering through December 10. Kit details and ordering – click here.
Thanks for stopping by! Happy crafting…

Project Materials:
The current host code is: CJSBNX7Z. Please use this code if your order is $150 or less (before shipping & taxes). Remember, if your order is over $150, you will receive the host rewards.
Nov 18, 2020 | August-December 2020 Mini Catalog, Bundles, Cards, Christmas, Holiday, Poinsettia Petals, Stampin' Up! |
For the past few weeks, I’ve been sharing a variety of Christmas card designs. This Poinsettia Petals Christmas card is one of my favorite designs. To cut the flowers petals, the Poinsettia Dies cut the Red Velvet Paper Pack creating a gorgeous poinsettia flower. For an elegant card base, the Wonder of the Season Memories & More cards with matching envelopes work perfectly. For added elegance, the Plush Poinsettia Specialty Paper and the Beaded Pearls embellishment are used. And for extra glam, the sentiment is heat embossed using Silver Stampin’ Emboss Powder. Below the photo, you’ll find tips for creating the card along with a list of project materials.

Materials:
- Poinsettia Petals Bundle
- Wonder of the Season Memories & More Cards with Envelopes
- Plush Poinsettia Specialty Paper (3” x 4”)
- Red Velvet Paper Pack
- Garden Green Cardstock & Garden Green Classic Ink Pad
- Silver Foil Sheet
- Whisper White Cardstock
- Versamark Pad
- Silver Stampin’ Emboss Powder
- Beaded Pearls
- 5/8” Polka Dot Tulle Ribbon
- Adhesive Sheets (3” x 4”)
- Mini Stampin’ Dimensionals
- Glue Dots
- Paper Snips
- Sponge Dauber
- Stampin’ Cut & Emboss Machine
- Heat Tool
Directions:
- Using the Poinsettia Dies, cut the following:
- from the Red Velvet Paper Pack
- one large poinsettia layer
- one medium poinsettia layer
- one small poinsettia layer
- from Garden Green cardstock
- from Silver Foil Sheet
- Attach the 3″ x 4″ adhesive sheet to the Plush Poinsettia Specialty Paper. Then, attach to the card base front being sure to center inside the red frame on the card. (TIP: use adhesive sheets with vellum style paper to attach without the adhesive showing)
- Assemble and layer the poinsettia (large, medium, small flower) using glue dots and Mini Stampin’ Dimensionals to attach the layers. TIP: place the mini dimensionals under the layers of poinsettia petals for added dimension to the flower.
- Use the Garden Green Classic Ink Pad to sponge edges of leaves..
- Attach leaves and silver fronds behind the poinsettia using glue dots.
- Tuck strips of Polka Dot Tulle Ribbon behind the leaves & fronds with glue dots.
- Use mini Stampin’ Dimensionals to add the flower to the left side of card front atop the Plush Poinsettia Specialty Paper.
- Stamp sentiment using Versamark onto Whisper White cardstock, top with Silver Stampin’ Emboss Powder and heat set. Let cool slightly, then trim the paper around the sentiment using paper snips. Attach to the card using Stampin’ Dimensionals.
You’ll definitely see more creations from me using the Red Velvet Paper Pack! Cutting the velvet paper with embossing style dies creates added dimension. I hope you’ll give it a try.
Reminders:
Curvy Celebrations is underway! The Quite Curvy Variety Bundle is now available for you to order. Click here to view the products available.
Beary Comforting Paper Pumpkin Kit – Available for ordering through December 10. Detail and ordering – click here.

Margaret’s Customer Loyalty Program: Download the form (2020-2021 Customer Loyalty Form) for program details and start tracking your orders. Plus for your orders over $150, you’ll also receive rewards from Stampin’ Up! Thank you for placing your order with me. You can order Project Materials at the bottom of the post or click here to visit my Online Store. I sincerely appreciate your orders.
Thanks for stopping by! Happy crafting…

Project Materials:
The current host code is: CJSBNX7Z. Please use this code if your order is $150 or less (before shipping & taxes). Remember, if your order is over $150, you will receive the host rewards.
Nov 16, 2020 | August-December 2020 Mini Catalog, Christmas, In The Pines, Quick & Easy, Simple Stamping |
Today’s card, In the Pines Season’s Greetings, is a simple stamping card that can be assembled quickly. The In The Pines Bundle contains the In the Pines Stamp Set and the Pine Woods Dies providing a variety of products for your creations. Not only is the bundle appropriate for holiday cards, it is great to use for nature inspired card themes.

Materials:
- In the Pines Bundle
- Shaded Spruce cardstock: 4-1/4” x 11” – score at 5-1/2” and fold for card base; 4” x 5-1/4” (layer 1)
- Whisper White cardstock: 4-3/8” x 3-1/8” (layer 2); 3-1/2” x 2-3/4” for tree oval; ½” x 3” for sentiment banner
- Classic Christmas 6” x 6” Designer Series Paper: Shaded Spruce design 4-1/4” x 3”
- Oval Layering Dies (2nd largest)
- Subtle 3D Embossing Folder
- Banner Pick A Punch
- Shaded Spruce Classic Ink Pad
- Gold Twine (from Wonder of the Season Ribbon Pack) – 8”
- Stampin’ Seal
- Stampin’ Dimensionals
- Glue Dots
Directions for the In The Pines Season’s Greetings card:
- Texture emboss the 5-1/4” x 4” Shaded Spruce cardstock using the Subtle 3D texture embossing folder. Attach to the card base front using strong adhesive.
- Layer the designer series paper atop the Whisper White cardstock. Attach to the texture embossed layer near the top of the embossed piece – leave room to add the sentiment banner.
- Select pine tree die from the Pine Woods Dies and cut pine from Whisper White cardstock. Die cut tree in the center of the oval. Attach to designer series paper using Stampin’ Dimensionals.
- Stamp sentiment onto strip of Whisper White cardstock using Shaded Spruce Classic Ink Pad. Punch ends to create banner. Attach to card using dimensionals.
- Embellish tree trunk at base with a gold twine bow (attach with glue dot).
Using this basic design, you can change the colors, switch the pattern of designer series paper to create an entirely different look. I’ll be sharing more cards using the In The Pines Bundle so be sure to follow my blog.
Reminders:
Curvy Celebrations is underway! The Quite Curvy Variety Bundle is now available for you to order. Click here to view the products available.
Beary Comforting Paper Pumpkin Kit – Available for ordering through December 10. Detail and ordering – click here.

Margaret’s Customer Loyalty Program: Download the form (2020-2021 Customer Loyalty Form) for program details and start tracking your orders. Plus for your orders over $150, you’ll also receive rewards from Stampin’ Up! Thank you for placing your order with me. You can order Project Materials at the bottom of the post or click here to visit my Online Store. I sincerely appreciate your orders.
Thanks for stopping by! Happy crafting…
Project Materials:
The current host code is: CJSBNX7Z. Please use this code if your order is $150 or less (before shipping & taxes). Remember, if your order is over $150, you will receive the host rewards.


