Jun 26, 2020 | 2020-2021 Annual Catalog, Designer Series Paper, Flowers for Every Season, Quick & Easy, Treat Holders, Uncategorized |
Today’s project is a quick and easy Matchbook Style Treat Holder. The treat holders were “a little something” in the June To-Go Class packages. The new 2020-2022 In Color cardstock provides the coordinating base for the Flowers for Every Season Designer Series Paper. I just love that the Flowers with Every Season Designer Series Paper coordinates with all of the new In Colors! The small packages of m&m candies fit perfectly inside the Matchbook Style Treat Holder but it’s easy to place other treats inside of a small cellophane bag to insert into the treat holder.

Side view of the Matchbook Style Treat Holder (with the package of m&m candies)

How To Create the Matchbook Style Treat Holder:
For the matchbook body: Cut a piece of cardstock 2-3/4″ x 8-1/2″. Score at 3-1/2″, 4″ and 7-3/4″; burnish the score lines with a bone folder. Then, fold along the 7-3/4″ score line and staple to create a tab to hold the top closed. (remember, we’re making a matchbook)
Next, cut the following:
- coordinating cardstock – one piece at 2-1/2″ x 3-1/4″ and another piece at 2-1/2″ x 5/8″
- Flowers for Every Season Designer Series Paper: one piece 2-1/2″ x 3″ & one piece 2-1/4″ x 1/2″
After cutting, add the designer series paper to the cardstock pieces using Stampin’ Seal. Attach the layered panels to the front of the matchbook.
Stamp the “A Little Something” from the Parcels and Petal Stamp Set using Tuxedo Black Memento Ink onto a scrap of Whisper White cardstock. After stamping, use the 1-1/2″ circle punch to cut (position so that the sentiment is toward the bottom of the circle leaving room for the ribbon).
Finish by tying a small bow using the 2020-2022 In Colors 1/4″ ribbon. Add to the sentiment label using a Mini Glue Dot.
Don’t you love how simple it is to make these treat holders? One piece of 8-1/2 x 11″ cardstock will make four treat holders so you can create lots of treat holders quickly!
Personal note: I did a video showing how to make these treat holders and was all set to add it but alas, it’s sideways! After several hours of trying to edit and correct, I gave up – the technology gremlins won!!!
Reminder:
There is still time to purchase the June Tutorial Bundle.

You have several ways of receiving the 3D Tutorial Bundle:
1. Order $50 (before taxes and shipping) from my online store between now and June 30, 2020 and you’ll get the PDF for FREE. Note: be sure to register allowing me to contact you so I receive notice of your order and can send the tutorial.
2. Purchase the June 3D Tutorial Bundle PDF (a total of 6 tutorials) for $15.00. This is a one-time purchase. Simply drop me an email at [email protected] and I will send you a PayPal Invoice. Upon receipt of payment, I will send you the tutorial bundle.
3. Join my Playtime with Paper team! Team members always receive the tutorials for FREE! From now through June 30th, Stampin’ Up! is offering a Pick A Free Bundle Promotion. When you become a Stampin’ Up! demonstrator, you can choose any stamp and tool bundle from the new 2020–2021 Annual Catalog for FREE. So it’s a great time to join! Click here to join.
Thank you for stopping by today and happy crafting! 
Project Materials: (click on link to order)
The Host Code for June is K3A9P6XS. Please use Host Code only if your order is less than $150. If your order exceeds $150, you will receive the host rewards! Prior to completing your order, you will have the opportunity to enter the code into the blank space labeled Host Code. Thank you!
Jun 12, 2020 | Kits, Paper Pumpkin, Stampin' Up!, Uncategorized |
The Paper Pumpkin kits continue to get better and better! In the July kit, you can celebrate the magic of summer nights with the Summer Nights Paper Pumpkin Kit! In this exclusive fun-filled kit, you’ll unbox enough supplies to create nine postcard-style cards, coordinating envelopes, and die-cut tealight bags. What’s even more spectacular about July’s kit is the add-on you can purchase along with it! The Summer Nights Add-On includes 24 card bases and envelopes in coordinating Summer Nights designs. This add-on is perfect for helping you expand the creative experience beyond the Paper Pumpkin kit. Between the add-on and the leftover supplies from your kit, you will be crafting a summer night worth celebrating all month long!

ABOUT THE JULY KIT:
Kit contains enough supplies to create nine postcards and coordinating envelopes, as well as nine die-cut tealight bags.
- Card size: 4” x 5-1/4” (10.2 x 13.3 cm)
- Envelope size: 4-1/2” x 5-3/4” (11.4 x 14.6 cm)
Coordinating Colors: Blackberry Bliss, Calypso Coral, Costal Cabana, Night of Navy
ABOUT THE ADD-ON:
Contains 24 preprinted card bases and coordinating envelopes.
- Card size: 4-1/4″ x 5-1/2″ (10.8 x 14 cm)
- Envelope size: 4-1/2″ x 5-3/4″ (11.4 x 14.6 cm)
The Summer Nights Add-On is not required to complete the Paper Pumpkin kit projects.
ADD-ON ORDERING INFORMATION
Purchase the Summer Nights Add-On through my online store starting 1 July, while supplies last! Here is the item number: 154973 | $10.00.
The Paper Pumpkin kit does not require the add-on to create completed projects.
Don’t miss out on the fireworks, fireflies, and fun! Subscribe to the Summer Nights Paper Pumpkin Kit between 11 June and 10 July, and order the Summer Nights Add-On starting 1 July or while supplies last.
Register for the July Paper Pumpkin here. Be sure to do so before July 10!
Reminder:
The June Tutorial Bundle is available for purchase.
You have several ways of receiving the 3D Tutorial Bundle:
1. Order $50 (before taxes and shipping) from my online store between now and June 30, 2020 and you’ll get the PDF for FREE. Note: be sure to register and allow me to contact you so I receive notice of your order and can send the tutorial.
2. Purchase the June 3D Tutorial Bundle PDF (a total of 6 tutorials) for $15.00. This is a one-time purchase. Simply drop me an email at [email protected] and I will send you a PayPal Invoice. Upon receipt of payment, I will send you the tutorial bundle.
3. Join my Playtime with Paper team! Team members always receive the tutorials for FREE!
Thank you for stopping by today and happy crafting!

Jun 8, 2020 | 2020-2021 Annual Catalog, Cards, Celebrate Sunflowers, Designer Series Paper, Floral, Flowers for Every Season, Flowers for Every Season, Product Suites, Uncategorized |
While waiting for delivery of my new product order, I continue to create cards using the items from my preorder. One of the suites demonstrators could order early is the Flowers for Every Season Suite. The suite is full of products that coordinate. For today’s Celebrate with Sunflowers card, the Flowers for Every Season 6″ x 6″ Designer Series Paper provides a beautiful floral base for the sentiment. With the colorful designs in the paper, it makes it easy to create beautiful cards. The designer series paper design incorporates the new 2020-2022 In Colors, so I used the coordinating cardstock for the card. The sentiment and leaf embellishments are in the Celebrate Sunflowers Bundle which is also part of the Flowers for Every Season Suite.

Card Details:
- Card base: Cut Cinnamon Cider cardstock 5-1/2″ x 8-1/2″, score at 4-1/4″ and fold.
- First Layer: Bumblebee cardstock cut to 5-1/4″ x 4″. Attach to the Cinnamon Cider cardstock card base.
- Cut the sunflower print from the Flowers for Every Season Designer Series paper to 5″ x 3-3/4″. Adhere to the Bumblebee cardstock layer.
- Stamp the sentiment from the Celebrate Sunflowers Stamp Set on the center of a 1-1/2″ x 4″ piece of Whisper White cardstock using Tuxedo Black Memento Ink Pad. Cut using the Stitched Rectangles Dies.
- Using the Sunflowers Dies, cut 2 of the large leaves and the coordinating leaf veins from Just Jade cardstock. Assemble the leaves by adding the veins to the coordinating leaf. TIP: Use the Adhesive Sheets for the leaf veins. This makes it easy to attach to the coordinating leaf base.
- Add the leaves to the back of the sentiment label with adhesive and then attach the label to the card front using Stampin’ Dimensionals.
- Tie a small bow using the Bumblebee In Color 1/4″ Ribbon and add to the side of the sentiment label.
- Embellish the label using the Cinnamon Cider Enamel Dots from the 2020-2022 In Color Enamel Dots collection.
Under the Project Materials section, you’ll find links to the products used for this card. You can purchase the entire Flowers for Every Season Suite or just the individual components that you prefer.
Reminder:
The June Tutorial Bundle is available for purchase.
You have several ways of receiving the 3D Tutorial Bundle:
1. Order $50 (before taxes and shipping) from my online store between now and June 30, 2020 and you’ll get the PDF for FREE. Note: be sure to register and allow me to contact you so I receive notice of your order and can send the tutorial.
2. Purchase the June 3D Tutorial Bundle PDF (a total of 6 tutorials) for $15.00. This is a one-time purchase. Simply drop me an email at [email protected] and I will send you a PayPal Invoice. Upon receipt of payment, I will send you the tutorial bundle.
3. Join my Playtime with Paper team! Team members always receive the tutorials for FREE!
You can place your product orders directly via my online store. Or, you can also order via the links under Project Materials (either the bundle or individual components).
According to the latest tracking, the Big Brown Truck is nearby! So my order of new products will be arriving soon. Guess what I’ll be doing the remainder of the day?!
Thank you for stopping by today and happy crafting!
Project Materials: (click on link to order)
The Host Code for June is K3A9P6XS. Please use Host Code only if your order is less than $150. If your order exceeds $150, you will receive the host rewards! Prior to completing your order, you will have the opportunity to enter the code into the blank space labeled Host Code. Thank you!
Jun 1, 2020 | 2020-2021 Annual Catalog, 3D, Bundles, Celebrate Sunflowers, Flowers for Every Season, In Colors, New Colors, Product Suites, Stampin' Blends, Tutorials, Uncategorized |

It’s a new month and to kick it off, we have the June 3D Tutorial Bundle! We have the fabulous Tammy Civello joining us as a guest designer for this month’s 3D tutorial. In addition to the tutorial bundle, the team is featuring a blog hop! Even better, we’re each sharing a second project created using the same products to coordinate with our tutorial project. This month, the team is featuring products from the Flowers for Every Season Suite for our projects. This suite of products is in the upcoming 2020-2021 Annual Catalog and will be available for purchase on June 3.
Remember, the projects designed for the 3D tutorial bundle aren’t available elsewhere online. Therefore, you’ll receive EXCLUSIVE projects in the tutorial bundle. In addition, both Imperial and Metric measurements are included for each project.
Now for a Sneak Peek of the June 3D projects…
Here’s my bonus project to coordinate with my June 3D tutorial. It features the Celebrate Sunflowers Bundle which is included in the Flowers for Every Season Suite. Also, check out the new In-Color, Misty Moonlight.

Card Details:
- Using a 4-1/4″ x 11″ piece of Misty Moonlight cardstock, score at 5-1/2″ and fold to create the card base.
- A layer of 4-1/8″ x 5-3/8″ piece of the Misty Moonlight In Color 6″ x 6″ Designer Series.
- With the large sunflower stamp from the Celebrate Sunflowers Stamp Set, stamp the image onto a 3-1/2″ x 3-1/2″ piece of Whisper White cardstock using Soft Suede Classic Stampin’ Pad. Color the sunflower image using the following Stampin’ Blends Markers: Light Soft Suede (flower center), Light So Saffron, Light Pumpkin Pie and Dark Daffodil Delight (flower petals). Cut using the coordinating die from the Sunflowers Dies.
- On a 4-1/2″ x 3-1/2″ piece of Whisper White cardstock, stamp the sentiment on the lower right side of the cardstock using the Misty Moonlight Classic Ink Pad (Item #153118). Lucky for me, an ink spot of this color is in the May Paper Pumpkin kit!
- Stamp three (3) of the large leaves from the Celebrate Sunflowers stamp set onto the Whisper White cardstock using Old Olive Classic Stampin’ Pad. TIP: for determining placement of the leaves, lay the die cut sunflower onto the cardstock to give you an idea where to stamp the leaves. Remove the sunflower and then stamp the leaves. Color the leaves using the Light Old Olive Stampin’ Blends Marker. Next adhere to the card offset by aligning the Whisper White edge with the right edge of the Designer Series Paper layer.
- Attach the die cut sunflower to the card using Stampin’ Dimensionals.
- Embellish by adding the Misty Moonlight Enamel Dots (from the 2020-2022 In Color Enamel Dots package).
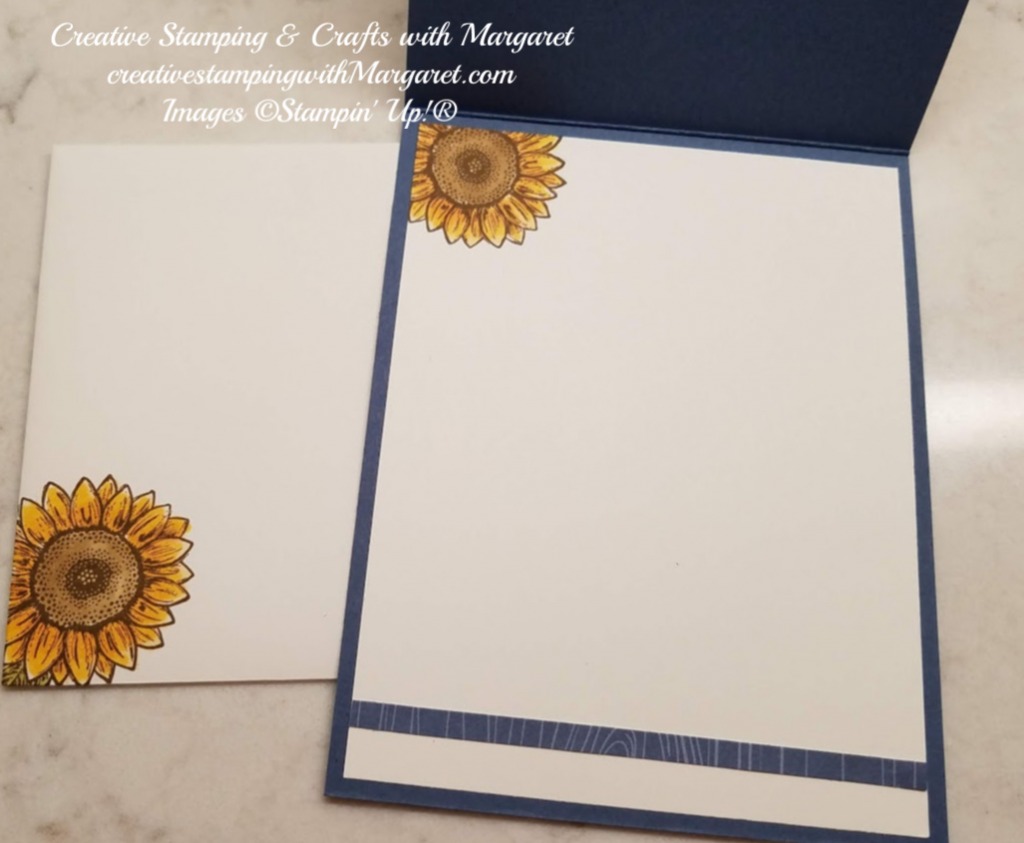
One more thing – embellish the card interior and the envelope!

For easy ordering, check out all the products in the Flowers for Every Season Suite (Item #154132). The suite offers lots of products for creating a variety of floral themed cards and projects. Remember, the new in color and suite items can be ordered beginning on June 3, 2020.
Would you like the Tutorial Bundle?
You have several ways of receiving the 3D Tutorial Bundle:
1. Order $50 (before taxes and shipping) from my online store between now and June 30, 2020 and you’ll get the PDF for FREE. Note: be sure to register and allow me to contact you so I receive notice of your order and can send the tutorial.
2. Purchase the June 3D Tutorial Bundle PDF (a total of 6 tutorials) for $15.00. This is a one-time purchase. Simply drop me an email at [email protected] and I will send you a PayPal Invoice. Upon receipt of payment, I will send you the tutorial bundle.
3. Join my Playtime with Paper team! Team members always receive the tutorials for FREE!
You can place your product orders directly via my online store. Or, you can also order via the links under Project Materials (either the bundle or individual components).
Thank you for stopping by today and happy crafting!
Now to hop along:
- Gloria Plunkett at Designz By Gloria
- Cindee Wilkinson at Just Sponge It
- Kurstan Del Rosario at Stamp with Kurstan
- Margaret Knight at Creative Stamping with Margaret – you are here
- Laurie Bradshaw at Craft Coach Laurie
- Tammy Civello at Cards by TLC
Project Materials: (click on link to order)
The Host Code for June is K3A9P6XS. Please use Host Code only if your order is less than $150. If your order exceeds $150, you will receive the host rewards! Prior to completing your order, you will have the opportunity to enter the code into the blank space labeled Host Code. Thank you!
May 18, 2020 | 2020-2021 Annual Catalog, Cards, Ornate Garden Suite, Scrappy Strip, Technique, Uncategorized |
Have you seen the Scrappy Strip card technique? It’s a fun technique and is a great way to use scraps of cardstock or designer series paper. The amazing Bruno Bertucci (husband of Stampin’ Up! Demonstrator, Kylie Bertucci) shared the technique on Kylie’s You Tube Channel. So naturally, I decided to try the technique and selected the Ornate Garden Specialty Designer Series Paper for the card. If you recall from a previous post, the paper is part of the Ornate Garden Suite Early Release. Since it’s an early release, it’s available to order until May 31 and then will be available again on June 3 when the new Annual Catalog “goes live.” In addition to using the designer series paper, I included strips of cardstock. Look closely and you’ll see that the cardstock strips are texture embossed using the Ornate Garden 3D Embossing Folder. Notice how it adds extra dimension.

Card Materials:
- Card Base: Terracotta Tile cardstock (5-1/2″ x 8-1/2″, score at 4-1/4″ and fold)
- Layer 1: Early Espresso cardstock (5-1/4″ x 4″)
- Layer 2 and base for strips: Early Espresso cardstock (5″ x 3-3/4″)
- Ornate Garden Specialty Designer Series Paper (select 2 patterns) approximate sizes: 5-1/2″ x 6″ and 5-1/2″ x 4″
- Terracotta Tile (5-1/2″ x 3″)
- Ornate Floral 3D Embossing Folder
- So Sentimental Stamp Set
- Terracotta Tile Classic Stampin’ Pad
- Stitched Shapes Dies (use the 2nd largest Oval Die)
- Terracotta Tile Ribbon – 8″ to wrap around card panel and additional to tie a small bow (from Ornate Garden Combo Ribbon)
- Whisper White cardstock: 2-1/4″ x 3″ for sentiment, 5-1/4″ x 4″ for interior
- Multipurpose Liquid Glue
- Stampin’ Dimensionals
Card Directions & Assembly:
- Use the Ornate Floral 3D embossing folder to texture emboss the 5-1/3″ x 3″ piece of Terracotta Tile cardstock.
- A total of 9 strips will be needed for the card – 7 strips from the Ornate Garden Specialty DSP (6 for front of card, 1 for the interior) and 2 strips from the Terracotta Tile cardstock. (For this card, 4 strips were cut from one pattern and the remaining from the coordinating pattern of DSP.) To cut strips, angle your paper on cutter and cut strip – flip paper and repeat until you have enough strips. NOTE: an exact measurement isn’t needed and you can cut strips as wide or as narrow as wanted. The key is to cut at an angle.
- Attach the first strip to the 5″ x 3-3/4″ Early Espresso cardstock layer. When attaching, line up the first angled piece with the edge of the card.

- Add remaining strips to the card, spacing evenly across the panel front.

- Flip the scrappy strip layer over and trim the overhanging pieces evenly with the Early Espresso cardstock.

- Attach the Scrappy Strip panel to the 5-1/4″ x 4″ Early Espresso cardstock layer.
- Wrap the 8″ piece of Terracotta Tile ribbon around the panel. Attach the panel to the Terracotta Tile card base using a strong adhesive.
- Stamp the sentiment onto the 2-1/4″ x 3″ piece of Whisper White cardstock using Terracotta Tile Classic Stampin’ Pad and cut using the Stitched Shapes Oval Die.
- Use Stampin’ Dimensionals to add the sentiment to the card front and add a small bow to the side of the sentiment.
- Embellish the interior of the card with the extra scrappy strip.
Pull out those scraps of paper and try the Scrappy Strip Technique. It’s an addicting technique!
Just a reminder:
Be sure to check the Last-Chance Products list and grab your favorites. The final day to order the last-chance products is June 2 or while supplies last.
Thank you for stopping by today and happy crafting!
Project Materials: (click on link to order)
The Host Code for May is R929JEAV. Please use Host Code only if your order is less than $150. If your order exceeds $150, you will receive the host rewards! Prior to completing your order, you will have the opportunity to enter the code into the blank space labeled Host Code. Thank you!
May 15, 2020 | 2019-2020 Annual Catalog, Bird Ballad, Cards, Designer Series Paper, Thank You, Uncategorized |
It’s that time in the Stampin’ Up! year when efforts to use retiring papers occurs. The 2020-2021 Annual Catalog release in on June 3 so it’s time to make room for new products. Today’s card features the retiring Bird Ballad Designer Series Paper. Sorry to see this paper go as it’s been one of my favorites. This card was one of the May class “to go” cards and highlights the Bird Ballad Designer Series Paper. For details on creating this simple card but cheerful card, continue reading. Card Materials:
- Base: Petal Pink 5-1/2″ x 8-1/2″, score at 4-1/4″ and fold
- “retiring” Bird Ballad Designer Series Paper (DSP)
- Layer 1: Floral Design – 4″ x 5-1/4″
- Layer 2: Polka Dot Design – 3: x 4-1/4″
- Fussy cut a bird for the card from the DSP
- Whisper White cardstock: 2-3/4″ x 2-1/2″ for the label and 4″ x 5-1/4″ for the interior
- So Sentimental Bundle (So Sentimental Stamp Set & Stitched So Sweetly Dies)
- Tuxedo Black Memento Ink Pad
- Embellishments:
- Mossy Meadow Linen Thread (from the Magnolia Lane Ribbon Combo Pack
- Frosted Flower Embellishments
- Snail Adhesive
- Mini Glue Dots
- Stampin’ Dimensionals
Card Directions & Assembly:
- Attach the Bird Ballad Designer Series Paper, Layers 1 & 2, to the Petal Pink card base.
- Stamp the “Thank You” sentiment from the So Sentimental Stamp Set onto the 2-3/4″ x 2-1/2″ piece of Whisper White cardstock. After stamping, cut using the coordinating die from the Stitched So Sweetly Dies.
- Add sentiment label to the card front using Stampin’ Dimensionals, then add the bird to the right side of the label. NOTE: You may need to add a Stampin’ Dimensional to the side of the bird that overhangs the label.
- With the Old Olive Baker’s Twine, tie a double string bow. Attach to the sentiment label using a mini glue dot.
- Add a frosted flower as a final embellishment.
Be sure to check the Last-Chance Products list and grab your favorites. The final day to order the last-chance products is June 2 or while supplies last. Take note: the Bird Ballad DSP, Magnolia Ribbon Combo and Frosted Flower Embellishments are discounted!!!
Thank you for stopping by today and happy crafting!
Project Materials: (click on link to order)
The Host Code for May is R929JEAV. Please use Host Code only if your order is less than $150. If your order exceeds $150, you will receive the host rewards! Prior to completing your order, you will have the opportunity to enter the code into the blank space labeled Host Code. Thank you!