It’s a new month and to kick it off, we have the June 3D Tutorial Bundle! We have the fabulous Tammy Civello joining us as a guest designer for this month’s 3D tutorial. In addition to the tutorial bundle, the team is featuring a blog hop! Even better, we’re each sharing a second project created using the same products to coordinate with our tutorial project. This month, the team is featuring products from the Flowers for Every Season Suite for our projects. This suite of products is in the upcoming 2020-2021 Annual Catalog and will be available for purchase on June 3.
Remember, the projects designed for the 3D tutorial bundle aren’t available elsewhere online. Therefore, you’ll receive EXCLUSIVE projects in the tutorial bundle. In addition, both Imperial and Metric measurements are included for each project.
Now for a Sneak Peek of the June 3D projects…
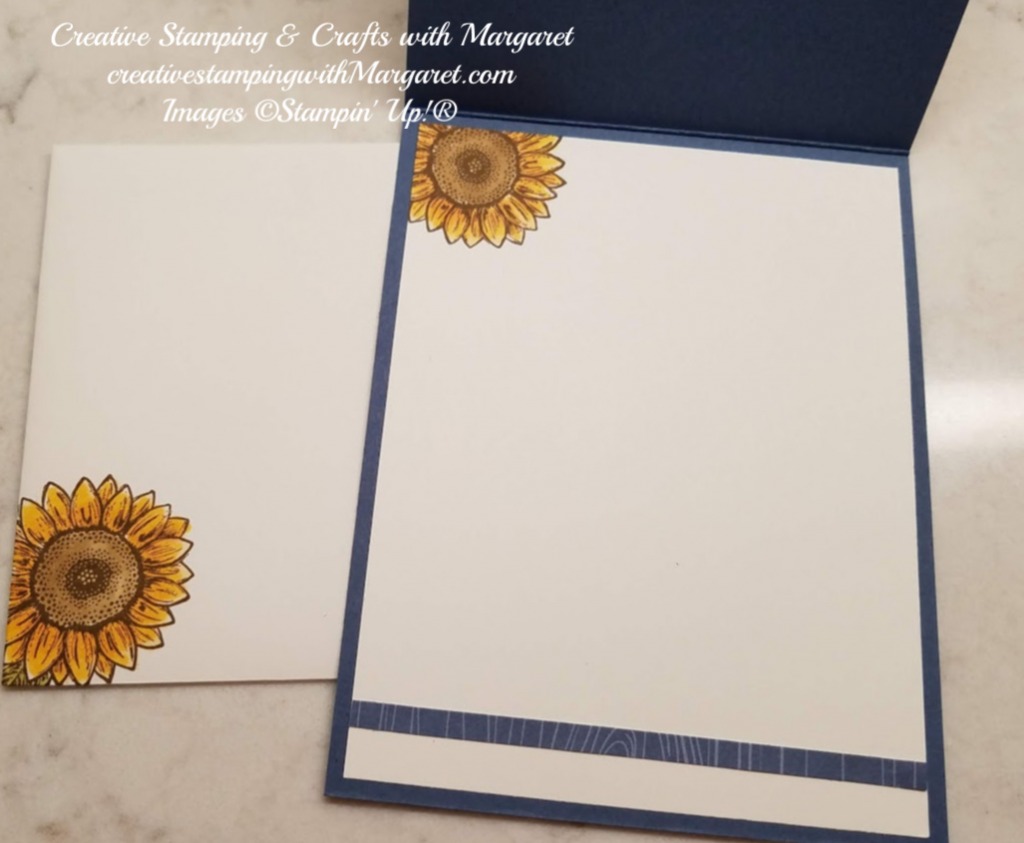
Here’s my bonus project to coordinate with my June 3D tutorial. It features the Celebrate Sunflowers Bundle which is included in the Flowers for Every Season Suite. Also, check out the new In-Color, Misty Moonlight.
Card Details:
Using a 4-1/4″ x 11″ piece of Misty Moonlight cardstock, score at 5-1/2″ and fold to create the card base.
A layer of 4-1/8″ x 5-3/8″ piece of the Misty Moonlight In Color 6″ x 6″ Designer Series.
With the large sunflower stamp from the Celebrate Sunflowers Stamp Set, stamp the image onto a 3-1/2″ x 3-1/2″ piece of Whisper White cardstock using Soft Suede Classic Stampin’ Pad. Color the sunflower image using the following Stampin’ Blends Markers: Light Soft Suede (flower center), Light So Saffron, Light Pumpkin Pie and Dark Daffodil Delight (flower petals). Cut using the coordinating die from the Sunflowers Dies.
On a 4-1/2″ x 3-1/2″ piece of Whisper White cardstock, stamp the sentiment on the lower right side of the cardstock using the Misty Moonlight Classic Ink Pad (Item #153118). Lucky for me, an ink spot of this color is in the May Paper Pumpkin kit!
Stamp three (3) of the large leaves from the Celebrate Sunflowers stamp set onto the Whisper White cardstock using Old Olive Classic Stampin’ Pad. TIP: for determining placement of the leaves, lay the die cut sunflower onto the cardstock to give you an idea where to stamp the leaves. Remove the sunflower and then stamp the leaves. Color the leaves using the Light Old Olive Stampin’ Blends Marker. Next adhere to the card offset by aligning the Whisper White edge with the right edge of the Designer Series Paper layer.
Attach the die cut sunflower to the card using Stampin’ Dimensionals.
Embellish by adding the Misty Moonlight Enamel Dots (from the 2020-2022 In Color Enamel Dots package).
One more thing – embellish the card interior and the envelope!
For easy ordering, check out all the products in the Flowers for Every Season Suite (Item #154132). The suite offers lots of products for creating a variety of floral themed cards and projects. Remember, the new in color and suite items can be ordered beginning on June 3, 2020.
Would you like the Tutorial Bundle?
You have several ways of receiving the 3D Tutorial Bundle:
1. Order $50 (before taxes and shipping) from my online store between now and June 30, 2020 and you’ll get the PDF for FREE. Note: be sure to register and allow me to contact you so I receive notice of your order and can send the tutorial.
2. Purchase the June 3D Tutorial Bundle PDF (a total of 6 tutorials) for $15.00. This is a one-time purchase. Simply drop me an email at [email protected] and I will send you a PayPal Invoice. Upon receipt of payment, I will send you the tutorial bundle.
3. Join my Playtime with Paper team! Team members always receive the tutorials for FREE!
You can place your product orders directly via my online store. Or, you can also order via the links under Project Materials (either the bundle or individual components).
Thank you for stopping by today and happy crafting!
The Host Code for June is K3A9P6XS. Please use Host Code only if your order is less than $150. If your order exceeds $150, you will receive the host rewards! Prior to completing your order, you will have the opportunity to enter the code into the blank space labeled Host Code. Thank you!
Due to the current health situation, many weddings have to be postponed. When the event is rescheduled, be prepared with a beautiful card. I’m calling today’s card the Poppy Moments Wedding Card, since it features poppies cut with the Poppies Moments Dies. The sentiment and label are from the So Sentimental Bundle. Due to social distancing, the May card class was held via Zoom and participants had fun creating this card together virtually.
And hip, hip, hooray! I have a You Tube video tutorial for you. It’s the first, but I promise you not the last that I’ll create. Yes, it took me awhile but I think I have the filming and editing somewhat figured out. Who said you can’t teach an old dog new tricks! LOL If you scroll past the video, you’ll find the list of materials needed to create the card and assembly details.
Card Materials:
Card Base: Whisper White Thick Cardstock (5-1/2″ x 8-1/2″, score at 4-1/4″ and fold)
Layer 1: Whisper White cardstock (5-1/4″ x 4″)
Subtle 3D Embossing Folder
Poppy Moments Dies
So Sentimental Bundle (So Sentimental Stamp Set and Stitched So Sweetly Dies)
Tuxedo Black Memento Ink Pad
Petal Pink cardstock (3-3/4″ x 2-1/2″ for label; 2″ x 4″ for poppies)
Vellum cardstock (2″ x 4″ for poppies)
Soft Seafoam Green cardstock – scraps for leaves
Old Olive cardstock (scraps for leaves
Basic Black cardstock (scrap piece for flower stamens)
Petal Pink Metallic-Edge Ribbon (on the Last-Chance Products list)
Pearl Basic Jewels
Basic Adhesive Backed Sequins (on the Last-Chance Products list)
Multipurpose Liquid Glue
Mini Glue Dots
Stampin’ Dimensionals
Card Directions & Assembly:
Using the Subtle 3D Embossing Folder, texture emboss the 5-1/4″ x 4″ Whisper White cardstock. After embossing, adhere to the Whisper White Thick cardstock base.
Cut the following using the Poppy Moments Dies:
Petal Pink poppy flower outlines – 2
Vellum Cardstock poppy flower bodies – 2
Soft Seafoam Cardstock small leaves – 2
Old Olive cardstock small leaves overlays – 2
Soft Seafoam cardstock slender leaves – 3
Old Olive cardstock slend leaves overlays – 3
Basic Black small flower stamens – 2
Attach the overlays to the leaves using Multipurpose Liquid Adhesive.
Next, add the Poppy overlays to the Vellum Poppy bodies by using a Mini Glue Dot in the center of the overlay. NOTE: The overlay is not attached completely to the vellum, just attached at the center.
With mini glue dots, add the Basic Black stamen to the center of the Poppy overlay.
Stamp the sentiment onto the Petal Pink and cut label shape.
Add the leaves and flowers to the back of the label.
Attach the label piece to the front of the card with Stampin’ Dimensionals.
Embellish the center of the stamen with Pearls Basic Jewels.
Tie a small knot bow with the Petal Pink Metallic-Edge Ribbon. Add to the card with a mini glue dot and embellish the card with the Basic Adhesive Backed Sequins.
All the materials for recreating this card will be available in the upcoming new Annual Catalog except for the ribbon and the sequins. If you want the Petal Pink Metallic-Edge Ribbon or the Basic Adhesive Backed Sequins, be sure to order quickly!
Just a reminder:
Be sure to check the Last-Chance Products list to order some of your favorite products from the current catalog before they are no longer available. The final day to order the last-chance products is June 2 or while supplies last.
Thank you for stopping by and happy crafting!
Project Materials: (click on link to order)
The Host Code for May is R929JEAV and the Host Code for June is K3A9P6XS. Please use Host Code only if your order is less than $150. If your order exceeds $150, you will receive the host rewards! Prior to completing your order, you will have the opportunity to enter the code into the blank space labeled Host Code. Thank you!
It’s a new month and to kick it off, we have the May 3D Tutorial Bundle! In addition to the May 3D Tutorial Bundle, the team is featuring a blog hop. We’re each sharing a project created to coordinate with our tutorial project. This month’s tutorial bundle feature a variety of creative projects.
Remember, the projects designed for the 3D tutorial bundle aren’t available elsewhere online. Therefore, you’ll receive EXCLUSIVE projects in the tutorial bundle. In addition, both Imperial and Metric measurements are included for each project.
Now for a Sneak Peek of the May 3D projects…
The card below coordinates with my 3D project and is great to use when you need a card with a masculine theme. Be sure to “hop along” following the links at the bottom of this page to check out the other projects from the 3D Tutorial Bundle Design Team.
Card Details:
Card Base: Balmy Blue (5-1/2″ x 11″, score at 4-1/4″ and fold to create card)
Add 4-1/8″ x 5-3/8″ piece of the striped Come Sail Away Designer Series Paper to the card base using adhesive.
Cut the compass design of the Come Sail Away Designer Series Paper (3-7/8″ x 5-1/8″) and attach to the striped layer on the card.
On a 2-1/2″ x 2-1/2″ piece of Whisper White cardstock, stamp the small sailboat from the Sailing Home Stamp Set using Tuxedo Black Memento Ink Pad. Color the boat using Balmy Blue Light Stampin’ Blends Marker and Crumb Cake Light Stampin’ Blends Marker. Cut using the coordinating Smooth Sailing Dies.
Stamp the “You Are My True North” sentiment using Night of Navy Classic Stampin’ Pad onto a 1/2″ x 3″ strip of Whisper White cardstock.
Wrap the Night of Navy/Sahara Sand Baker’s Twine around the card twice and tie creating a small bow. To hold in place, add a Mini Glue Dot beneath the knot of the bow.
Add the sentiment and the sailboat to the lower front area of the card using Stampin’ Dimensionals.
Finish by adding a Sail Away Trinket onto the card with a Mini Glue Dot.
If desired, embellish the envelope by stamping the compass with Night of Navy Classic Stampin’ Pad on a lower corner.
The Come Sail Away Designer Series Paper, the Night of Navy/Sahara Sand Baker’s Twine and the Sail Away Trinkets are retiring and offered on the Last-Chance List so grab them before they are gone!
Would you like the Tutorial Bundle?
You have several ways of receiving the 3D Tutorial Bundle:
1. Order $50 (before taxes and shipping) from my online store between now and May 31, 2020 and you’ll get the PDF for FREE. Note: be sure to register and allow me to contact you so I receive notice of your order and can send the tutorial.
2. Purchase the May 3D Tutorial Bundle PDF (a total of 6 tutorials) for $15.00. This is a one-time purchase. Simply drop me an email at [email protected] and I will send you a PayPal Invoice. Upon receipt of payment, I will send you the tutorial bundle.
3. Join my Playtime with Paper team! Team members always receive the tutorials for FREE!
You can place your product orders directly via my online store. Or, you can also order via the links under Project Materials (either the bundle or individual components).
Thank you for stopping by today and happy crafting!
Project Materials: (click on link to order)
The Host Code for May is R929JEAV. Please use Host Code only if your order is less than $150. If your order exceeds $150, you will receive the host rewards! Prior to completing your order, you will have the opportunity to enter the code into the blank space labeled Host Code. Thank you!
During the cleaning and reorganizing of my craft cave recently, I came across a package of Lipstick Ink Pens ordered from Amazon last year for one of those “good intentions” projects. You know you have “good intentions” to make a project, order all the materials but it never gets made! Can you relate? Thought I can’t remember the original design, I knew the Dressed to Impress bundle would be perfect to create a 3D project using the ink pens. Even better, the Best Dressed Designer Series Paper contains a variety of colors to coordinate with the Lipstick Ink Pens. The resulting project is a Lipstick Pen and Post-It Note Holder.
For this week’s Playtime with Paper team online meeting, members received a kit for creating this project. It was a fun to be able to meet virtually and craft together making the project.
Project Materials:
Cut the following pieces of cardstock:
Base: 4-1/4″ x 11″, score at 5-1/2″ and fold.
Inner Support: cardstock 4″ x 4-1/2″. On the 4-1/2″ side, score at 1/2″, 2-1/4″ and 4″. Fold along score lines to form a “W”.
Lipstick holder: 3-1/2″ x 2-3/4″. Score along the 3-1/2″ side at 3/4″, 1-1/2″, 2-1/4″ and 3″. Score the 2-3/4″ side at 2″. Use bone folder to burnish along the score lines.
For sentiment: Whisper White cardstock 2-1/4″ x 2-1/4″
Select desired Best Dressed Designer Series Paper and cut as follows:
Use the 5-1/4″ x 4″ Best Dressed Designer Series Paper to one side of the cardstock base. This will be the front side of your project.
Attach the inner support piece to the inside of the base. To do so, add a strong adhesive such as Tear & Tape Adhesive or Multipurpose Liquid Glue to the outside of each of the 1/2″ flaps and attach each flap to the lower interior edge of the base.
Create the lipstick holder. With paper snips, cut along each score line on the 3-3/4″ side up to the 2″ scored line. After cutting, you will have 4 tabs that are 3/4″ and one tab that is 1/2″. Cut and remove the 1/2″ tab up to the 2″ score line then cut a small angle at bottom of the tab. Trim along each side of the tab. Add adhesive to outside of the 1/2″ tab and fold side over to create tube. Fold each of the flaps and seal with adhesive to form the tube bottom. Finish by adding the 1/2″ x 1-3/4″ Designer Series Paper to three sides of the tube. With strong adhesive, add the lipstick tube holder to the front panel of the base.
Add the Post-It Notes to the front of the base using a strong adhesive aligning the bottom of note pad with bottom of lipstick tube holder.
Stamp sentiment onto the Whisper White cardstock. Cut using the circle Stitched Shapes Die.
Add the sentiment above the post-it notes using Stampin’ Dimensionals.
Embellish by adding a small bow using Mini Glue Dots.
Have fun selecting your favorite Best Dressed Designer Series Paper and coordinating cardstock to create a Lipstick Pen Holder and Post-It Notes holder for your desk. Be sure to share your project with me in the comments section!
Important to note:
A reminder that Stampin’ Up! has released the Last-Chance Product List. The list includes the Best Dressed Designer Series Paper and the Dressed to Impress Bundle. The designer series paper will no longer be available after June 3 or while supplies last. The Dressed to Impress Stamp Set and the coordinating All Dressed Up dies will return in the 2020-2021 Annual Catalog but not offered as a bundle. Recall that a bundle saves you 10% vs purchasing the items individually.
Thank you for stopping by today and happy crafting!
Project Materials: (click on link to order)
The Host Code for April is YKAF2FU2. Please use Host Code only if your order is less than $150. If your order exceeds $150, you will receive the host rewards! Prior to completing your order, you will have the opportunity to enter the code into the blank space labeled Host Code. Thank you!
It’s a new month and to kick it off, we have the April 3D Tutorial Bundle! In addition to the April 3D Tutorial Bundle, the team is featuring a blog hop. We’re each sharing a project created to coordinate with our tutorial project. The theme for this month is Mother’s Day and more Spring Celebrations.
Remember, the projects designed for the 3D tutorial bundle aren’t available elsewhere online. Therefore, you’ll receive EXCLUSIVE projects in the tutorial bundle. In addition, you’ll receive both Imperial and Metric project measurements.
Here’s a Sneak Peek of the April 3D projects…
You’re going to love the projects featured in this month’s tutorial!
The card to coordinate with my 3D project is for Mother’s Day but the sentiment can easily be changed to use for a variety of occasions. Be sure to scroll below the card photo for card details and the Design Sketch.
The card design utilizes the sketch below:Card Details:
To create the card base, cut a 4-1/4″ x 11″ piece of Seaside Spray cardstock and score/fold at 5-1/2″.
Next, make the second layer using a piece of 3-1/4″ x 4-1/2″ Whisper White cardstock. With the “splotch” stamp from the Delightful Day stamp set and Seaside Spray Classic Stampin’ pad, stamp a background on the Whisper White cardstock. TIP: stamp off once before stamping onto the cardstock to create a light background.
After stamping the background, emboss the second layer using the Subtle 3D Embossing Folder.
With the large Stitched Shapes circle die, cut the Seaside Spray gingham print from the 6″ x 6″ In-Color Designer Series Paper. Referring to the design sketch, cut the right side portion of the circle and attach to the Whisper White cardstock layer. Add to card base.
Using the Daisy Lane stamp set & Seaside Spray Classic Stampin’ Pad, stamp six medium daisies onto Whisper White cardstock. With coordinating Daisy Punch, cut the daisies. Then, layer two daisies together, adhering at the center with mini glue dots.
Cut four leaves from Old Olive cardstock using the Lovely Leaves Dies. Optional: sponge the edge of the leaves with Old Olive Classic Stampin’ Pad ink.
Next, add leaves to daisies with mini-glue dots and attach to card front using Stampin’ Dimensionals.
For an added touch, cut 2″-3″ strips of Polka Dot Tulle Ribbon and tuck among daisies using adhesive.
Using the Happy Mother’s Day sentiment in the Dressed to Impress Stamp Set, to stamp sentiment onto a strip of Whisper White cardstock. Cut into a banner shape using the Merry Christmas Dies. Sponge along the edge of the banner with the Seaside Spray ink. Then, add the banner to the card front using Stampin’ Dimensionals
To complete the card front, add a Clear Faceted Gem to the center of each daisy.
The Mother’s Day card along with the 3D project was lots of fun to create. Utilizing a Design Sketch when making a card is also a fun challenge.
Would you like the Tutorial Bundle?
You have several ways of receiving the 3D Tutorial Bundle:
1. Order $50 (before taxes and shipping) from my online store between now and April 30, 2020 and you’ll get the PDF for FREE. Note: be sure to register and allow me to contact you so I receive notice of your order and can send the tutorial.
2. Purchase the April 3D Tutorial Bundle PDF (a total of 6 tutorials) for $15.00. This is a one-time purchase. Simply drop me an email at [email protected] and I will send you a PayPal Invoice. Upon receipt of payment, I will send you the tutorial bundle.
3. Join my Playtime with Paper team! Team members always receive the tutorials for FREE!
You can place your product orders directly via my online store. Or, you can also order via the links under Project Materials (either the bundle or individual components).
Thanks for stopping by today! Check back again for more project ideas. Please stay healthy…
Project Materials: (click on link to order)
The Host Code for April is YKAF2FU2. Please use Host Code only if your order is less than $150. If your order exceeds $150, you will receive the host rewards! Prior to completing your order, you will have the opportunity to enter the code into the blank space labelled Host Code. Thank you!
It’s a new month and to kick it off, we have the March 3D Tutorial Bundle! In addition to the March 3D Tutorial Bundle, the team is featuring a blog hop. We’re each sharing a project created to coordinate with our tutorial project. The theme for this month is Spring Celebrations.
Remember, the projects designed for the 3D tutorial bundle aren’t available elsewhere online. Therefore, you’ll receive EXCLUSIVE projects in the tutorial bundle. In addition, you’ll receive both Imperial and Metric project measurements.
Here’s a Sneak Peek of the March 3D projects…
For my coordinating project, I designed an Easter card by combining several stamp sets. Don’t you agree the “little chick” from the Full of Happiness Stamp Set is cute and makes you think of Easter? Want to use the card for another Spring celebration? Just change out the sentiment.
Card Details:
Create card base using a 5-1/2″ x 8-1/2″ piece of Thick Whisper White cardstock. Score at 4-1/4″ and fold along score line.
Use a 5-1/4″ x 4″ piece of Granny Apple Green cardstock for the second layer. Attach to the card base with adhesive.
Cut a piece of Whisper White cardstock 5″ x 3-3/4″. On the right side of the cardstock, stamp the chick from the Full of Happiness stamp set. Use Daffodil Delight Classic Stampin’ Pad for the body, Pumpkin Pie Classic Stampin’ Pad for the feet and beak and Early Espresso Classic Stampin’ Pad for the eyes.
On a piece of Whisper White cardstock, stamp the egg shell outline using Sahara Sand Classic Stampin’ Pad. If desired, add the speckles using the same color. Cut using the coordinating Dino Dies.
Use the egg shell as a guide to determine where to stamp the greenery vines from the Thoughtful Blooms Stamp Set (this is a Sale-a-Bration Stamp Set, you can get it free with a $50 order!). Remove the egg shell and stamp the vine using Granny Apple Green Classic Stampin’ Pad. Also, stamp part of the vine below the chick’s feet. Stamp small flowers on the vine using Gorgeous Grape Classic Stampin’ Pad.
Stamp “Easter Greetings” sentiment from Fable Friends Stamp Set on the card using the Gorgeous Grape Classic Stampin’ Pad.
With adhesive, add to the Granny Apple Green layer.
Adhere the egg shell to the card front.
With the Small Bloom Punch (Sale-a-Bration brochure offering), cut 5 flowers from the Pleased As Punch Designer Series Paper.
Using the open leaves dies in the Detailed Bands Dies, cut 2 sets of leaves. Snip into pieces to length desired. Add to the card front using Mini Glue Dots.
Next, position the 5 flower blooms so they are cascading from the egg shell and attach using Mini Glue Dots. Lastly, complete the card by adding Rhinestone Basic Jewels to the center of each flower.
Would you like the Tutorial Bundle?
You have several ways of receiving the 3D Tutorial Bundle:
1. Order $50 (before taxes and shipping) from my online store between now and March 31, 2020 and you’ll get the PDF for FREE. Note: be sure to register and allow me to contact you so I receive notice of your order and can send the tutorial.
2. Purchase the March 3D Tutorial Bundle PDF (a total of 6 tutorials) for $15.00. This is a one-time purchase. Simply drop me an email at [email protected] and I will send you a PayPal Invoice and upon receipt of payment, will send you the tutorial bundle.
3. Join my Playtime with Paper team! Team members always receive the tutorials for FREE! (Plus during Sale-A-Bration is a great time to join Stampin’ Up!)
Reminder: Sale-a-Bration is ongoing so with a $50 or more order (before shipping & taxes), you can select FREE product from the Sale-a-Bration Brochure. Quantities are available while supplies last. The following are Sold Out: Kerchief Card Kit and the Metallic Baker’s Twine & Sequins Combo Pack.
You can place your product orders directly via my online store. Or, you can also order via the links under Project Materials (either the bundle or individual components).
Thanks for stopping by today! Check back again for more project ideas.
Project Materials: (click on link to order)
The Host Code for March is F99S6GD4. Please use Host Code only if your order is less than $150. If your order exceeds $150, you will receive the host rewards! Prior to completing your order, you will have the opportunity to enter the code into the blank space labelled Host Code. Thank you!
The content in this blog is the sole responsibility of Margaret Knight as an Independent Stampin’ Up!® Demonstrator. The use of and content of classes, services or products offered is not endorsed by Stampin’ Up!®