Today’s Christmas in July project offers a sneak peek of the Christmas to Remember Bundle from the July-December 2021 Mini Catalog. You’ll be able to order products from the Mini Catalog starting August 3, 2021. (Yes, catalog date is July but due to product and global shipping delays, launch had to be delayed.) The Christmas to Remember bundle is just one of the offerings in the Painted Christmas Suite. This was one of the first bundles on my preorder list. With the array of holiday greetings in the stamp set, I have plenty of greetings for holiday cards. When combined with the coordinating Christmas Pinecone Dies as a background, beautiful holiday cards are easy to create. For my project, the Painted Christmas Designer Series Paper creates the background for layering the die cuts.
Do you want to recreate this beautiful card? If so, you’ll find the list of materials and a video tutorial for assembly below.
Project Materials: (product numbers added for items in the Mini Catalog, all other products are in Annual Catalog)
Christmas to Remember Bundle (#156806 available on August 3)
Painted Christmas Designer Series Paper: 5-1/2″ x 4-1/4″ (#156292 available for order on August 3)
Thick Basic White Cardstock for base: 5-1/2″ x 8-1/2″, score and fold at 4-1/4″
Evening Evergreen Cardstock: 5-1/2″ x 4-1/4″
Basic White Cardstock: 5-1/4″ x 4-1/4″; 2-3/4″ x 2-1/4″ (for sentiment label)
Cherry Cobbler Cardstock: 3-1/2″ x 2-1/2″
Stitched So Sweetly Dies
Evergreen Classic Ink Pad
Gold Fine Art Ribbon
Simply Elegant Trim
Wonderful Gems (#156289, available for order on August 3)
Multipurpose Liquid Adhesive
Stampin’ Dimensionals
Cut & Emboss Die Cutting Machine
Be sure to mark the date of August 3 on your calendar! Ordering from the Mini Catalog begins.
Reminders & Other Announcements
Click here to check out the select Designer Series Papers on Sale!
Margaret’s Customer Loyalty Program: Download the form (Customer Loyalty Form) for program details and start tracking your orders. Remember for orders over $150, you’ll also receive rewards from Stampin’ Up! You can order by clicking this link: Margaret’s Online Store. Thank you for selecting to place your order with me. I truly appreciate your orders.
Check back on Friday for another Christmas in July project with a video tutorial. Projects will post at noon EST.
It’s a new month and to kick it off, we have the June 3D Tutorial Bundle! We have the fabulous Tammy Civello joining us as a guest designer for this month’s 3D tutorial. In addition to the tutorial bundle, the team is featuring a blog hop! Even better, we’re each sharing a second project created using the same products to coordinate with our tutorial project. This month, the team is featuring products from the Flowers for Every Season Suite for our projects. This suite of products is in the upcoming 2020-2021 Annual Catalog and will be available for purchase on June 3.
Remember, the projects designed for the 3D tutorial bundle aren’t available elsewhere online. Therefore, you’ll receive EXCLUSIVE projects in the tutorial bundle. In addition, both Imperial and Metric measurements are included for each project.
Now for a Sneak Peek of the June 3D projects…
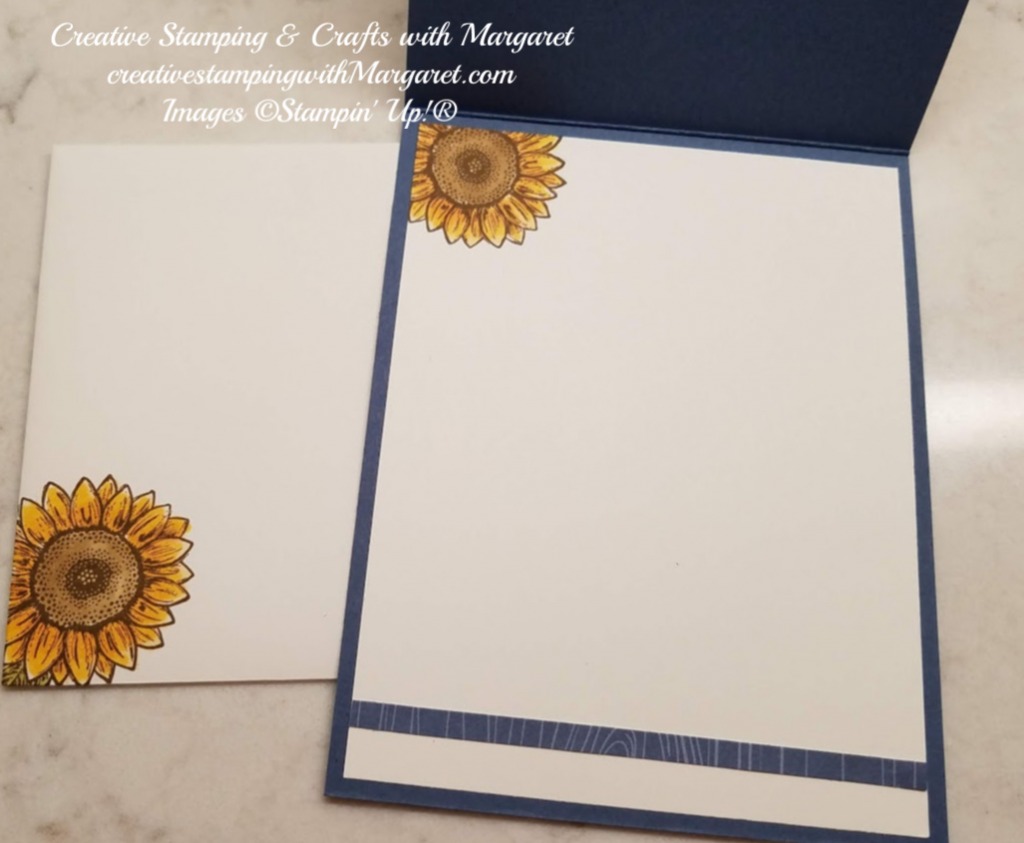
Here’s my bonus project to coordinate with my June 3D tutorial. It features the Celebrate Sunflowers Bundle which is included in the Flowers for Every Season Suite. Also, check out the new In-Color, Misty Moonlight.
Card Details:
Using a 4-1/4″ x 11″ piece of Misty Moonlight cardstock, score at 5-1/2″ and fold to create the card base.
A layer of 4-1/8″ x 5-3/8″ piece of the Misty Moonlight In Color 6″ x 6″ Designer Series.
With the large sunflower stamp from the Celebrate Sunflowers Stamp Set, stamp the image onto a 3-1/2″ x 3-1/2″ piece of Whisper White cardstock using Soft Suede Classic Stampin’ Pad. Color the sunflower image using the following Stampin’ Blends Markers: Light Soft Suede (flower center), Light So Saffron, Light Pumpkin Pie and Dark Daffodil Delight (flower petals). Cut using the coordinating die from the Sunflowers Dies.
On a 4-1/2″ x 3-1/2″ piece of Whisper White cardstock, stamp the sentiment on the lower right side of the cardstock using the Misty Moonlight Classic Ink Pad (Item #153118). Lucky for me, an ink spot of this color is in the May Paper Pumpkin kit!
Stamp three (3) of the large leaves from the Celebrate Sunflowers stamp set onto the Whisper White cardstock using Old Olive Classic Stampin’ Pad. TIP: for determining placement of the leaves, lay the die cut sunflower onto the cardstock to give you an idea where to stamp the leaves. Remove the sunflower and then stamp the leaves. Color the leaves using the Light Old Olive Stampin’ Blends Marker. Next adhere to the card offset by aligning the Whisper White edge with the right edge of the Designer Series Paper layer.
Attach the die cut sunflower to the card using Stampin’ Dimensionals.
Embellish by adding the Misty Moonlight Enamel Dots (from the 2020-2022 In Color Enamel Dots package).
One more thing – embellish the card interior and the envelope!
For easy ordering, check out all the products in the Flowers for Every Season Suite (Item #154132). The suite offers lots of products for creating a variety of floral themed cards and projects. Remember, the new in color and suite items can be ordered beginning on June 3, 2020.
Would you like the Tutorial Bundle?
You have several ways of receiving the 3D Tutorial Bundle:
1. Order $50 (before taxes and shipping) from my online store between now and June 30, 2020 and you’ll get the PDF for FREE. Note: be sure to register and allow me to contact you so I receive notice of your order and can send the tutorial.
2. Purchase the June 3D Tutorial Bundle PDF (a total of 6 tutorials) for $15.00. This is a one-time purchase. Simply drop me an email at creativestampingwithMargaret@gmail.com and I will send you a PayPal Invoice. Upon receipt of payment, I will send you the tutorial bundle.
3. Join my Playtime with Paper team! Team members always receive the tutorials for FREE!
You can place your product orders directly via my online store. Or, you can also order via the links under Project Materials (either the bundle or individual components).
Thank you for stopping by today and happy crafting!
The Host Code for June is K3A9P6XS. Please use Host Code only if your order is less than $150. If your order exceeds $150, you will receive the host rewards! Prior to completing your order, you will have the opportunity to enter the code into the blank space labeled Host Code. Thank you!
The content in this blog is the sole responsibility of Margaret Knight as an Independent Stampin’ Up!® Demonstrator. The use of and content of classes, services or products offered is not endorsed by Stampin’ Up!®