Aug 28, 2018 | 2018 Holiday Catalog, Boxes, Cards, Country Lane Suite, Mini Gable Box, Uncategorized |
Some of you joined me for a Facebook Live presentation last week showcasing the Country Lane Suite that is in the 2018 Holiday Catalog. While ordering is not available until next week, I am posting the information on the card materials and the Mini Gable Treat Box showcased during the presentation.

Project materials are as follows:
- Card base – Crushed Curry Cardstock: 4-1/4″ x 11″ scored at 5-1/2″ to create a top fold card base
- Country Lane Designer Series Paper (DSP): 5-1/4″ x 4″
- Blackberry Bliss Cardstock: cut 5-1/8″ x 3-7/8″
- Whisper White Cardstock: 5-1/2″ x 4″ (for inside of card, trim after completing card front and stamping the image to ensure you are able to center the image in the oval); 3-1/4″ x 3/4″ for sentiment
- Country Home Stamp Set,
- Layering Ovals Framelits
- Classic Stampin’ Ink: Mint Macaron, Blackberry Bliss
- Stampin’ Blends: Light Mint Macaron, Cajun Craze Light & Dark, Dark Daffodil Delight, Old Olive Light & Dark, Blackberry Bliss Light & Dark
- 3/16″ Braided Linen Trim
- Adhesives: Snail, Stampin’ Dimensionals, Mini Glue Dots
- Tools: Big Shot, Paper Snips
- Other: Cotton Swabs
I am also sharing another method for cutting the ovals versus the method demonstrated via the Facebook Live presentation. Both methods work equally well.


Embellished Mini Gable Box
A favorite project from the Facebook Live presentation is stamping an image from the Country Home Stamp set onto a Lustrous White Mini Gable Box (it’s also a funny portion of the presentation as I drew a blank on the name of the box!) Yes, we must laugh at ourselves! On to the project details, using Early Espresso Classic Stampin’ Pad stamp the desired image onto the side of the box. Next, sponge Balmy Blue Classic Ink around the floral bouquet image prior to coloring with a variety of Stampin’ Blends. Stamp a tag with Blackberry Bliss and cut using the 1″ circle punch. Use the 1-1/4″ circle punch to cut a scrap of Crumb Cake for the tag base. Further embellish with a folded strip of 1/4″ Rich Razzleberry Velvet Ribbon.

Thanks for stopping by. Remember the Country Home Suite of products will not be available until September 5 but add it to your must have list!
Quick Links:
Check out the products in the Color Your Season promotion
Shop the Clearance Rack
Download the Annual Catalog
Sign Up for my Newsletter
Shop my online store anytime
Contact Me

Aug 24, 2018 | Cards, Floral, Wedding |
Glancing at Impressions is my way of exposing you to both our Abstract Impressions stamp set and our Springtime Impressions Thinlits. They coordinate together and both are amazing to work with. I have addressed this suite on another post and wanted to share a few more samples because it’s such a great combination.

Glancing at Impressions
So today I want to share these other samples below. This suite is so versatile because you can use it for a variety of occassions. The cards below all have different color palettes. Therefore, they represent various feelings from the sender. Allow your receipent to appreciate the card and the personal message it sends.


You can get the Sprintime Impressions Thinlits and the Abstract Impressions stamp set through my online store. Remember though, if you order both products together, you can take advantage of the 10% off bundle option. I love to save money whenever I can because it gives me more options for other products. It’s also almost the end of the month and you can still earn the $5 coupon for every $50 spent in August (before tax and shipping).
Quick Links:
Check out the products in the Color Your Season promotion
Shop the Clearance Rack
Download the Annual Catalog
Sign Up for my Newsletter
Shop my online store anytime
Contact Me
Thanks for stopping by and happy stamping!

Aug 23, 2018 | 2018-2019 Annual Catalog, Aqua Painter, Bonus Days, Cards, Floral |
You can create lovely cards with Pretty Varied Vases. So, today I would like to share some samples of the Varied Vases stamp set. I enjoy using this stamp set. The vases are so delicate looking and while they are not all solid colored, you can color them or since this is a two-step stamp set, use an ink pad to fill your flower and vase shapes with color. To achieve a lighter color, stamp off onto a scrap of paper. With all the options we have for coloring, it may even be a difficult choice. Each of the blending options can have a different outcome. Another quick trick, is to select your favorite DSP and stamp the outline of a vase. Use the Vases Builder Punch to cut the vase and voila, you have a designer vase!
Pretty Varied Vases

Just look at the size variations and also, how many flower options you have. You can add other sentiments if you would like to expand the possibilities for using the images as was done above. 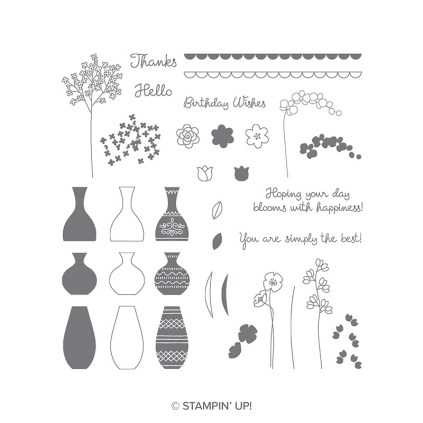
Because I have a soft spot for flowers, I’m drawn to this set and it’s amazing possibilities. Once I added the little flowers and soft colors, the project came together. Another useful product is the Vases Builder Punch which coordinates with the Varied Vases stamp set. It eliminates the need to fussy cut the vases and small flowers.

You can get both the Varied Vases stamp set and Vases Builder Punch through my online store. Pick up both products for 10% off because they are part of the Varied Vases Bundle. I love the bundles and how you can save money when you purchase them together. No matter if you pick up the bundle or the individual items, you won’t be disappointed.
Quick Links:
Check out the products in the Color Your Season promotion
Shop the Clearance Rack
Download the Annual Catalog
Sign Up for my Newsletter
Shop my online store anytime
Contact Me
Thanks for stopping by and happy stamping!
Aug 20, 2018 | Cards, CASE The Catalog, Christmas |
Happy Monday and it’s time for another CASE the Catalog. This week, in anticipation of the launch of the 12 Weeks of Christmas that starts later next month, I decided to create my version of the Christmas Pines sample on page 97 of the Annual Catalog. Also, keep in mind that the next few weeks will be consumed with holiday cards and projects. Our new Holiday Catalog is amazing. Lots of fun samples are coming. This sample is from the Annual Catalog because, well the Holiday Catalog doesn’t come out until September 5th. Enjoy

The Sheet Music stamp was used to create a custom background when inked with Crumb Cake and stamped onto a 5 1/4″ x 4″ piece of Whisper White cardstock. Finally, using the pine needles stamp from the Christmas Pines stamp set and Old Olive ink, stamp the upper left corner of the page. Furthermore, you can add color variation by stamping twice before re-inking the stamp.
CASE The Catalog
Here is “my version” – to create the look of an old piece of sheet music, tear small strip from all sides of the paper and lightly sponge the edges plus the lower portion of the page. Similarly to the catalog sample, I curled the edges slightly and adhered the page to the Crumb Cake cardstock base. Use Pretty Pines Thinlits Dies to cut the pine cones from Early Espresso cardstock and the leaves from Gold Foil. A bow of 1/4″ Copper Trim finished the look. Use the sentiment from the Christmas Pines stamp set and stamp using Mossy Meadow on Whisper White and cut using the Everyday Punch. A folded strip of 5/8″ Polka Dot Tulle Ribbon was placed under the sentiment to complete the card.
Quick Links:
Color Your Season promotion
Also Shop the Clearance Rack
Download the Annual Catalog
Sign Up for my Newsletter
Shop my online store anytime
Contact Me
Thanks for stopping by and happy stamping!
Aug 17, 2018 | Cards, Color Your Season, Floral, Gift Bag Punch Board, Uncategorized, Watercolor Pencils |
Remember the fun as a child to use crayons and a coloring book? In this month’s card class, it was designed to focus with coloring. The coloring being the use an image from the Blended Seasons bundle in the current Color Your Season promotion which is a limited-time offering. Included in the bundle is the Blended Seasons Stamp Set and the coordinating Stitched Seasons Framelits. Plus being offered is a new Watercolor Pencils Assortment of ten pencils in popular colors. The Watercolor Pencils Assortment 2 is full of colors that compliment the existing Watercolor Pencils in the Annual Catalog. The Blended Seasons stamp set provides the perfect base for focus with coloring and the watercolor pencils. Attendees are also able to create cards and a treat hold using all the limited-time products.
How Do You Focus With Coloring
The card below features the Blended Seasons flower stamp. Jet Black Stazon Ink was used to stamp the image and sentiment onto Shimmery White Cardstock (note – this is probably a great time to use your Stamparatus!) The images were colored using the Flirty Flamingo and Garden Green watercolor pencils from Assortment 2 along with an aqua painter to soften and blend the coloring. The Daffodil Delight Watercolor pencil from the original watercolor pencil set was used to color the flower centers. The middle flower was also stamped on a scrap piece of Shimmery White, colored and fussy cut to attach to the card using Stampin’ Dimensionals. Leaves are cut from Garden Green Cardstock using die from Stitched Seasons framelits.

Finally, to finish the card, add a touch of bling with several Basic Rhinestone Jewels also randomly added to the card front. Flirty Flamingo cardstock was used for the card base and a Basic Black cardstock layer was used to create a small frame around the Shimmery White stamped layer. Giving it even more dimension and another layer.
It keeps Getting Better
Use the Gift Bag Punch Board to cut the Cajun Craze cardstock. After cutting and scoring the Cajun Craze cardstock, the leaf stamp from Blended Seasons was also used to randomly stamp the paper using Cajun Craze classic stampin’ pad. The Stitched Seasons framelits were used to cut the tag components. Cut orange hue leaf using watercolor paper and a blend of Brusho Crystal Color. Behind the tag, the white side of a Pealized Doily was sponged with Mossy Meadow ink. Because the gold binder clip used as the bag closure has been discontinued, I recommend using the Gold Library Clips. The Thinking of You sentiment is from the Treat Time stamp set, stamp using Mossy Meadow ink. Substituting for another favorite sentiment is another way to go. Finally, It was completed by adding a triple bow of Linen Thread. See the full list of project materials below.

Finally, be sure to order your Blended Seasons Bundle and the Watercolor Pencils Assortment 2 soon…they are only available until August 31st or while supplies last. Because it has been so popular, it will probably sell out before the promotion ends.
Contact me if you have any questions regarding the projects or products!
Quick Links:
Color Your Season promotion
Also Shop the Clearance Rack
Download the Annual Catalog
Sign Up for my Newsletter
Shop my online store anytime
Contact Me
Thanks for stopping by and happy stamping!
Project Materials:
Aug 15, 2018 | Cards, Halloween, Project Kits |

Spooky days ahead for our Paper Pumpkin subscribers.
September’s Paper Pumpkin is an exclusive frightfully delightful kit and a scary-cute, special edition box. I’m almost ready to burst with excitement because I love the fun of Halloween. For anyone who has never subscribed to Paper Pumpkin, this is Stampin’ Up!’s monthly subscription service. Each month you receive a new kit that comes with all the products you need to create the special project of the month. You will receive step by step instructions and Stampin’ Up! also prepares a YouTube video with instructions. If you are a new subscriber, a Paper Pumpkin clear block (Size D) will be included in the first order. You can register here for this exclusive kit.

Previous subscribers are also certainly welcome to come back and try out this spooky kit. You can sign up here.
The box may even be a deal breaker. Creating amazing projects and maybe even add another type of project as an alternate will be loads of fun. Due to the amount of fun you will have, invite friends over and have an exciting time assembling the kit together. All you have to do is sign up by September 10th and enjoy a month of Paper Pumpkin. This exclusive Halloween kit and special box are a must have!
Quick Links:
Check out the products in the Color Your Season promotion
Shop the Clearance Rack
Download the Annual Catalog
Sign Up for my Newsletter
Shop my online store anytime
Contact Me
Thanks for stopping by and happy stamping!


